Wednesday, April 7, 2010

Vintage Vanity

I thought I would share some of my Vintage collection, not all of it but just my favourites. I’ve been buying vintage for about 3 years now and I am quite chuffed at my collection.
Clockwise: 1950's dusty pink evening dress, 1960's Go-Go dress, just-plain-adorable sailors’ mini dress, 1960's air hostess double breasted coat.

Clockwise: 1950's Black Sparkle Cocktail dress, 1950's Turquoise Evening dress, 1950's Ivory White Brocade, 1980's sparkle party dress.

1950's fur muff and hat.

No dates on either of these but aren't they just the sweetest?

It's not too clear but they are made of feather. 1940s.
The back unzips and it becomes a bonnet! 1950s

Most of my hats. I still have a couple more but they wouldn't fit on the table. They range from 1950s to 90's I would say.

Gloves galore!
Clip on earring collection and a couple of broaches, necklace and a caplet clip.
Hope you enjoyed,

Saturday, March 27, 2010

Blue Bird Vintage

Over 50 followers?! Thank you so much! I’m so glad that so many people like my blog it makes me all warm and fuzzy inside.

Easter holidays are coming up so I am busying away trying to get some more stock for a stall at the Retro Markets. I’m going to be selling some Vintage and Retro clothing as well as some hand made good and refashioned accessories. But before I can fully immerse myself in my stall I have a great deal of home work to do first. Boo! But if you are in Perth on the 11th of April come to the Burlesque lounge and say hello.

Besides from this I haven’t been up to a great deal. Finished working on Cabaret (hopefully I’ll have some photos to show soon) last week and have now moved on to Dance. The dance piece I am working most closely with is call “We’re all looking for love, Dear.” It’s a ballet with a 60’s feel and soft pastel pallet. Very cute but I am a little worried about the vintage dresses.

For any Perthies that read my blog there is a new Vintage/Retro clothing store that just opened near my work in Wembley called ‘Blue Bird Vintage’. I just popped in before work today and picked up a wonderful 80’s dose 50’s blue and white polka dot dress for $25. Everything is really reasonable prices so get in quick! It’s also right next door to Russell’s Antiques which is always good for a look around.


Tuesday, March 9, 2010

Burlesque Ball & News Paper Clipping


Last weekend at spur of the moment I bought a ticket to the burlesque ball. I really wanted to go but thought the tickets were a little too much to spurge on while I am saving to pay uni fees but my very persuasive friend Stacy convinced me that I needed to go.

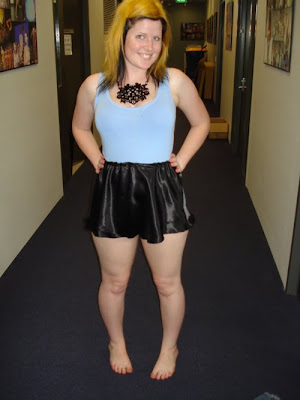
I only had two days to put together an outfit to wear but I think I did quite well as I won best dressed and a prize of $750 worth of vouchers. 

AND today a friend came in to uni and had asked if I’d seen the paper because I was in it! So many people asked for my photo that night but I never imagined this. Gosh, what a surprise. Just as well too, because I forgot to get a photo of myself again.  If only I could find someone who took photos of my Siamese twin costume. 


Monday, March 8, 2010

Seamed Stockings Tutorial

What you need:

~Stretch fabric- I used one-way stretch but if you want a little more comfort I think two-way would be better.

~Stretch Overlooking thread- You can use normal overlocking thread but you wont get the same give and comfort that Stretch will give you.

~Scissors

~Pins

The grid is 1 square equals 2.5 cm or one-inch-square. This is a size Medium and if you pick a good stretch and stretch overlocking can fit most sizes but if you are worried you can make the pattern larger by having each square equal 2.7cm or smaller 2.3cms.

This pattern has a 1cm seem allowance included.

Step One:

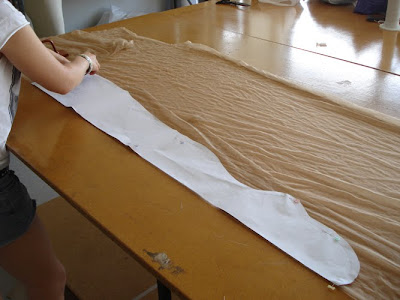
Make a fold about the width of you stocking on the fabric (each leg will need to be on a fold.)

Step Two:

Lay pattern on fold of fabric, pin and cut.

Step Three:

Pin and overlock open sides together leaving the top open.

Step Four:

Overlock around the top keeping it open and trim away excesses threads.


And Wallah! It’s done. Easy, huh? This pattern has an allocated allowance for a fold over to strengthen it while wearing suspenders but if you don’t like the look you can always cut it off at the height you like (make sure you try it on first or it might come out to short). You can also wear theses with the overlocking on the inside or out, there is not set way.

Now you have made your own stockings from scratch you can easily turn a pair of old panty hoes in seamed stockings. Just iron then flat and zoom away on your stretch threaded overlocker. :D

This tutorial is only for recreational use and is not for mass productions or sale.

Hope you all enjoyed my tutorial. If you have any questions or need help don’t hesitate to ask and I’ll get back to you as soon as I can! Oh, and photos! If you makes some take photos and let me see!

Sunday, February 28, 2010

Friends

I’ve been a bit busy as off late with uni, work and doing costume for a production of Macbeth in my free time. There’s so much that I am working on that I can’t wait to share with you (a straw boater, 18th century pocket panniers, a cage crinoline and hopeful some 50’s dresses for myself). But until then, I thought I would introduce to you some friends of mine who are new to the world of blogging.

Emma at ~ What’s My Scene ~
Emma is one of the most amazing people I have ever met. She is always so much fun to be around and always full of adventure. Emma is a part time Gothic Lolita, part time Vintage Starlet and part time Bogan all rolled into one wonderful package.


Alexandra at Lady A
Alexandra is a most talented sewer and a great problem solver. She is also terribly kind and will never leave you out in the cold when you need help. She is a terrific dancer and has the most amazing ideas (have a look at her pictures of her burlesque graduation).
I hope you find them as interesting and lovable as I do.

Thursday, February 18, 2010

Dressing Gown


I've got a fitting this afternoon with the actress that plays Lulu so I've been finishing things off to a fitting point. I just finished her dressing gown and it's turned out nicer then I thought which is always a good thing. :D
Hope you're having a great day so far,

Monday, February 15, 2010

French Knickers

Finished French knickers today and tomorrow i'll start work on the Teddie.


Modled by Emma.

For St. Valentine's day my boyfriend got me what I always wanted, a inflatable dinosaur. <3


What did you crazy kids get?

Wednesday, February 10, 2010

Cabaret

First slot this year I am costume crew for Cabaret and I am working on Lulu who is one of the Kit Cat girls who word at the club with Sally Bowles. Today I made the toiles (calico drafts) for her french nickers and teddy.


Modled by the wonderful Indie who is our Head Cutter for Cabaret.
The 'V' and semicircles will be made of a see-threw fabric while the rest will be a silky pink or purple fabric.


Sunday, February 7, 2010

First Day of 2nd Year


I am trying to make a good first impression on the first years so I'm taking a little more care on my out fits for uni.

Shirt: Op-shop
Skirt: Op-shop
Hat: Op-shop
Sewing Bag: A gift from my Mooma and Moopa.

Tuesday, February 2, 2010

How To Make a Sailor Hat

What seams to be a million years ago (Feb '08) I made a tutorial on how to make a Sailor Hat for an online Gothic Lolita site. This was before I had an overlocker (and while I was still a little scared of them) or fabric sissors and before I knew even half of what I know about sewing now, but it’s simple and it still makes a cute little hat.
Materials:
Fabric: Scrap corners will do, you really don't need alot. I used craft cotton for mine because it’s just a bit stiffer but any fabric will do.
Ribbon: 2 m (You might have some left over but it is better to be safe the sorry.)
Cotton: Both colours of your fabric and ribbon.


Step 1. Cut four triangles with the tops rounded to the point 5” high and 4” across.
If you are new to sewing cut your shape out on paper fist.


Step 2. Take two, pin together and sew along one of the rounded 5” sides.


Step 3. Join to another then the last to make a pyramid tipped box.


Step 4. Cut a rectangle along the fold of your fabric (if you can’t just double the width) 15” High and 2 1/2” wide.


Step 5. Unfold and mark where the ribbon stripes will be. Pin and sew the ribbon on to the outside of the fold.


Step 6. Now refold and fold in the ends.


Step 7. Place and pin around the open end of the pyramid tipped box. When you reach the start fold under the excess fabric and place the end over start to make a band.


Step 8. Determine where you would like to have the ribbon ties and pin into seem.


Step 9. Now, carefully sew around pinned seems making sure you catch the ribbon ties and both layers of fabric.


Step 10. Turn right way in and your hat it now complete.

If I were to do it again there definitely would be some changes but I thought you might like to have a little look. I hope you enjoyed!